
Advanced EMF Detector for Arduino
What is an EMF detector?
An EMF detector lets you detect electro magnetic fields. In some terms, it lets you detect electrical fields which are given off by people, electronics and other objects. It is frequently used in ghost hunting.
Here are some great example videos:
South Coast Paranoral
Dorset Ghosts / Top5s
MichaelDMagee
Parts List
The parts used here are generic parts available at almost any website. You can use dfrobot, electrodragon or even ebay.
Required:
- 1x Arduino Uno (prototyping) or Arduino Micro (final version) – $1.50 – 4.00
- 1x 9v or 2x Coin Battery adapter – $0.10
- 2x toggle buttons – $0.10
- 1x trimpot – $0.50
- 1x piezo speaker – $0.10
- 1x breadboard (prototyping) – $1.00
- 11x 100ohm resistors – $0.10
- 1x Solid wire (for the antenna) – $0.10
- Various Stranded wires (different colours) – $0.30
Optional:
- 1x FTDI Connector (for connecting to a Micro)
- 1x Balsa wood (casing)
- 1x protoboard (final version)
Designing the prototype on a Breadboard
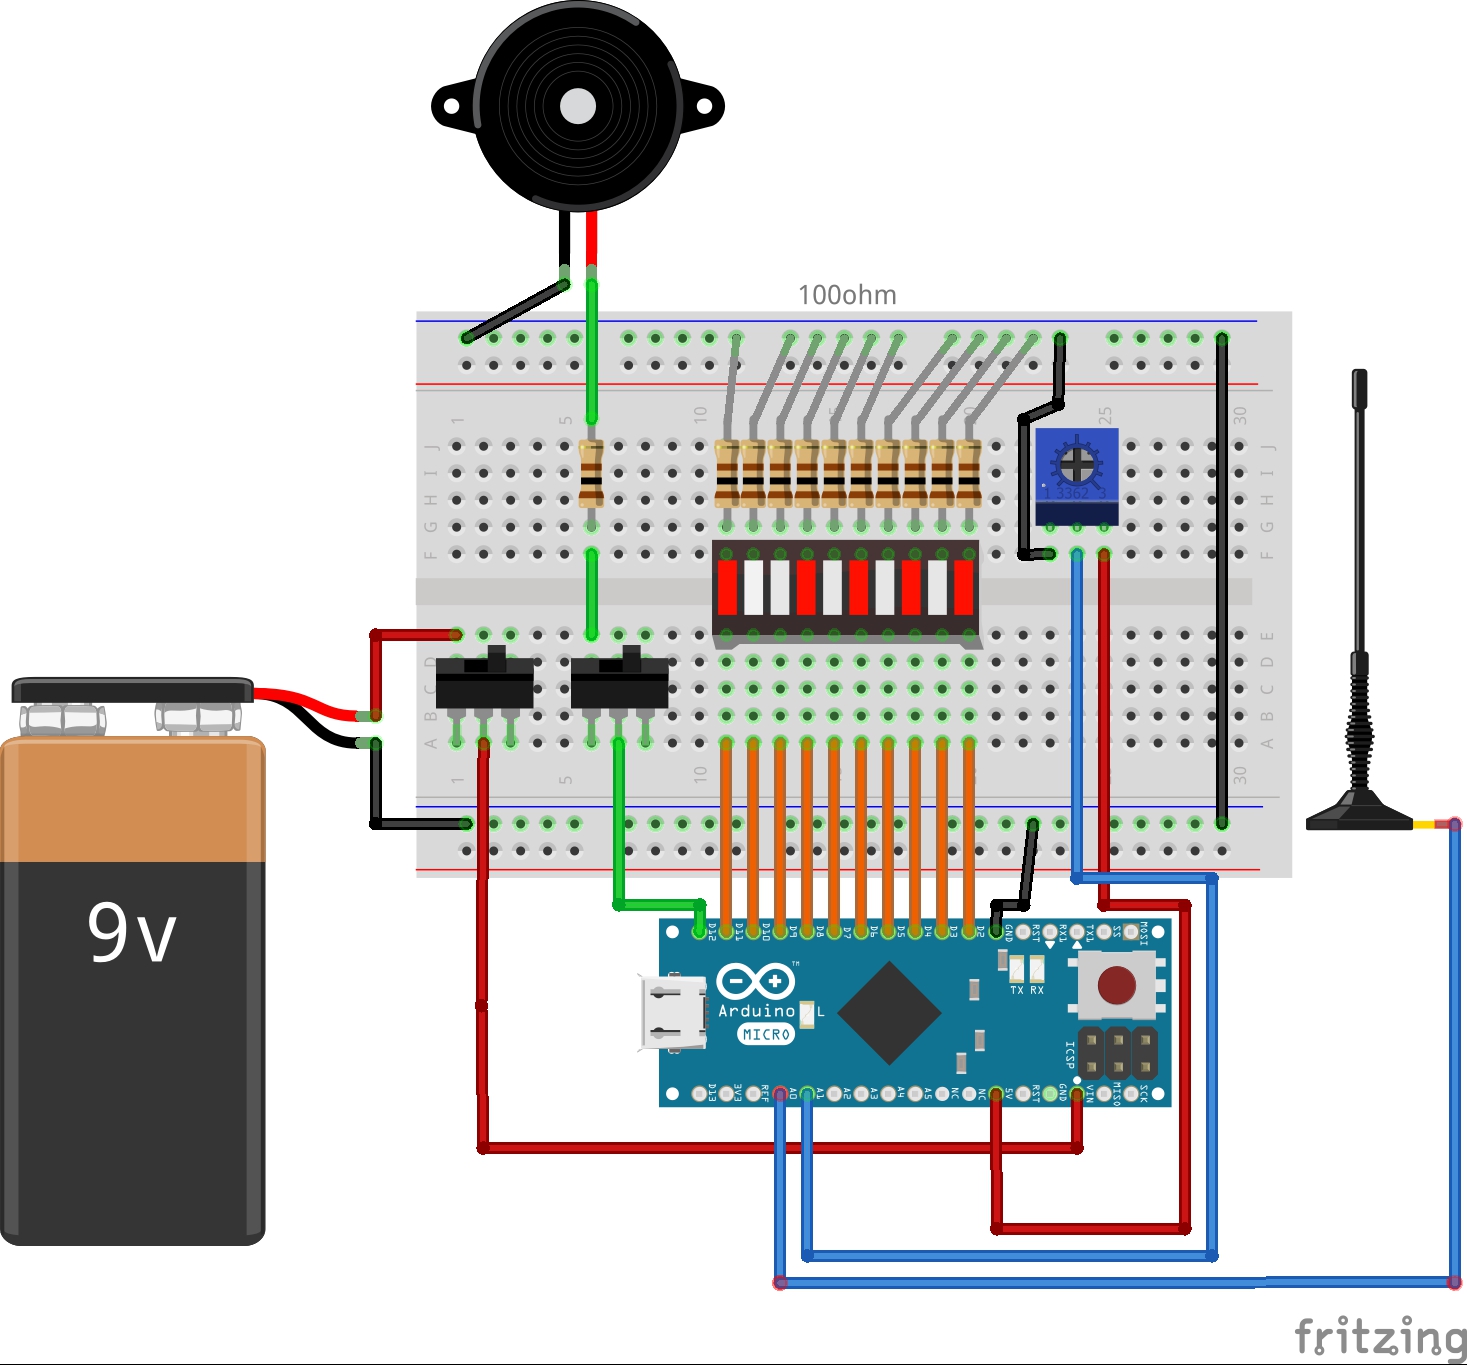
In the above breadboard schematic, you can see all of the components required to build the unit using the parts list above. For the development, we will be using an Arduino Uno. When we move to production, we will be using an Arduino Micro.
Assembling the Prototype
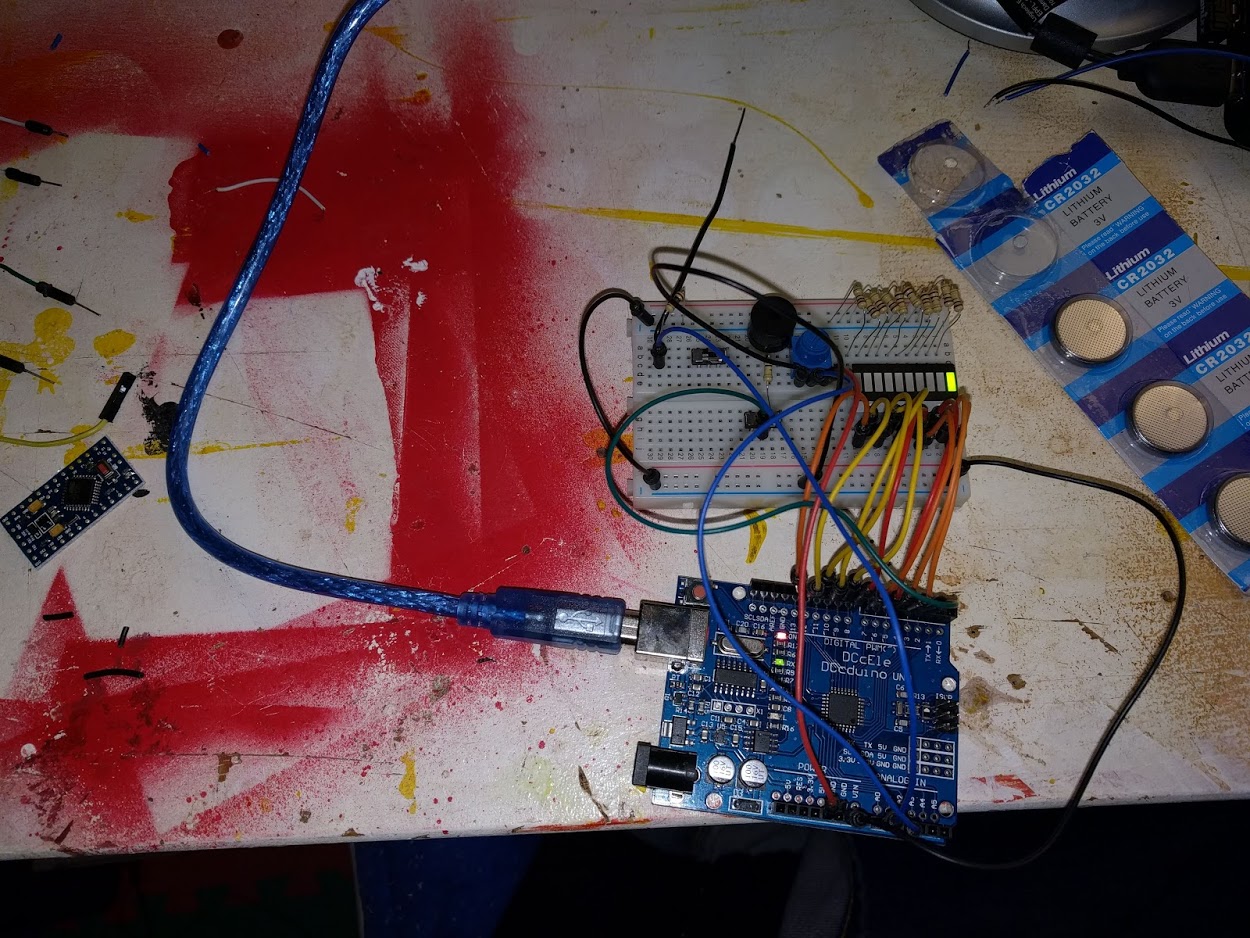
Above shows the concept as moved onto an Arduino Uno, and breadboard. In the above diagram, you will see a resistor (1m ohm) on the antenna. However, after completing development, I found it actually worked better without it.
Complete Unit

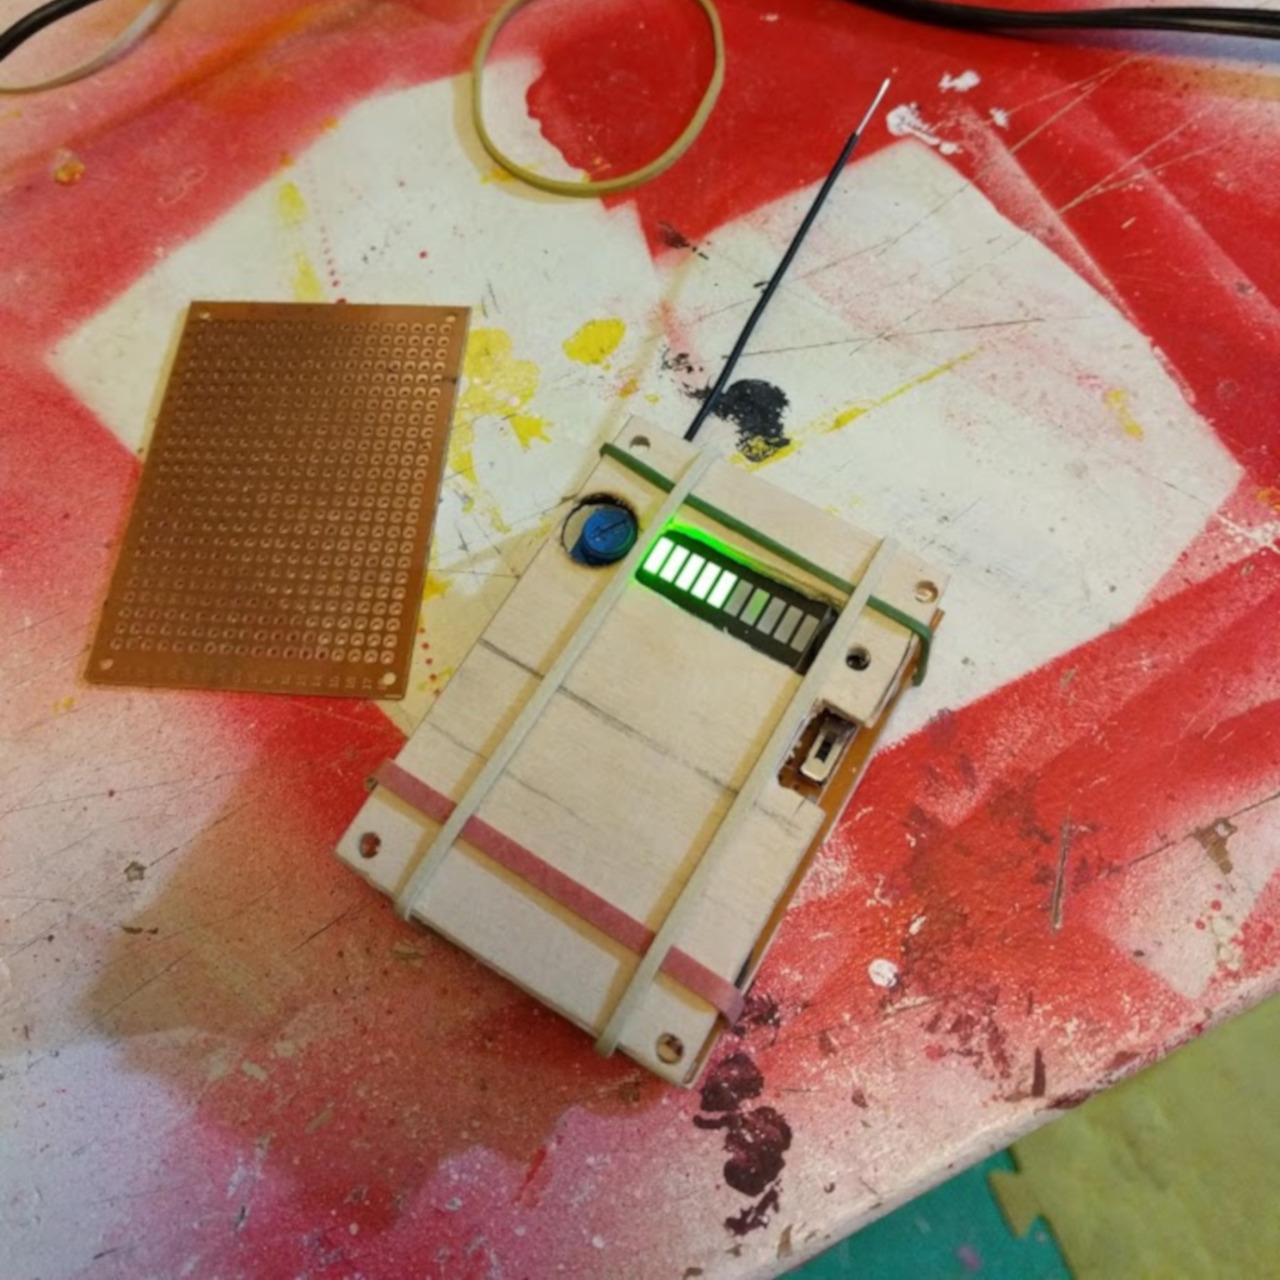
From there, moving the unit to a PCB and creating an enclosed unit is fairly simple.
Source Code:
So, what do you think? Is there a paranormal tool you’d like to see us create?
Hi found some bugs, if u look at pin 2 and 3 nothing happens, because u diffine pin 4 as the first, and what vaule is the pot meter ?
Good catch. The speaker was moved from and caused all the LED’s to get moved up (I don’t remember why now though). The code ended up changing while recording the video So it should be:
Attenna = A0; Trimpot = A1; Speaker = 3; LEDs = 4 onward;For the trimpot, I used a 10K, but because it is just subtracting itself from the antenna reading, something smaller would probably let you tune the dial betterHi. You mention electric field. Please can you tell me what this measure? Hz? V/m? Thank you….